
How to Import Plant Data into Garden Planner
This tutorial describes how to import plant data from a Spreadsheet to use in Garden Planner.
First up a little background.
Garden Planner was developed as tool centered on design. The idea being that you build your design and then add in the plant details. But we understand that some people may already have a list of plant data that they wish to bring into garden planner and assign to plant symbols.
So how do you do that?
First you need to get your data in the correct format to import into Garden Planner, which is csv. Most spreadsheet software and database software will let you easily export data as csv.
What's CSV: It stands for comma separated values. It's just a text file with each new plant on a new line and within each line the plant data is separated by a comma.
So what data can be imported?
At present you can import a table containing the following data:
Plant Title, Plant Width, Plant Length, Plant Height and Color
In a spreadsheet it would look like this.
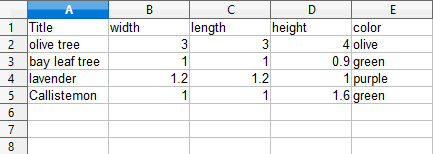
Important: the columns must be in this order. Title, width, length, height, color
You can leave any filed blank except title. If the title is blank then garden planner will ignore that whole row.
What about the measurement units?
for metric measurement the values need to be in metres. You can just have the value 2 or you could have 2m or even 2 metres. Garden Planner only looks at the numerical value.
for US (feet) measurements the values need to be in either feet or feet and inches. You can just have a single value, like 4 and that will be read as four feet. Or you could use the words feet or foot. Or the abbreviation ft or '
So any of the following are valid for US measurements.
| 2 foot 4 | 2 foot 4 inches | 2 feet 4 | 2 feet 4 inches |
| 2 ft 4 | 2 ft 4 in | 2'4 | 2'4" |
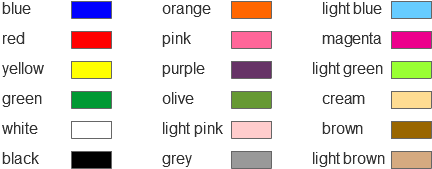
What about color?
you don't have to include color, you could just leave it blank, but if you do use it then it needs to one of the following words
What if I don't have a value for width and length, just spread?
if you only have spread value then just put that in the width column and leave length empty. Garden Planner will assume the width and length are the same if there is a value for width and not for length.
Getting the CSV file to import
if you already have the data in a spreadsheet, odds are that your columns wont be in the same order as required for importing. So the best idea is to create a new sheet and set the top row to be Title, width, length, height, color. Then copy and paste your data into the appropriate columns.
You want it to look something like this. Remember: you can leave fields blank if you wish.
How you then turn this table into a CSV file will depend on which spreadsheet tool you use.
In Google Sheets: choose Download from the file menu and pick Comma-separated values.
In MS Excel: choose Save as from the File menu and from the drop down pick CSV (comma delimitated) as the save as type.
In Open Office Spreadsheet: choose Save as from the File menu and from the drop down pick Text CSV as the format.
Now you have a CSV file you can bring into Garden Planner.
To import the CSV file
In Garden Planner choose Import table (csv) from the File menu. You will see this window.
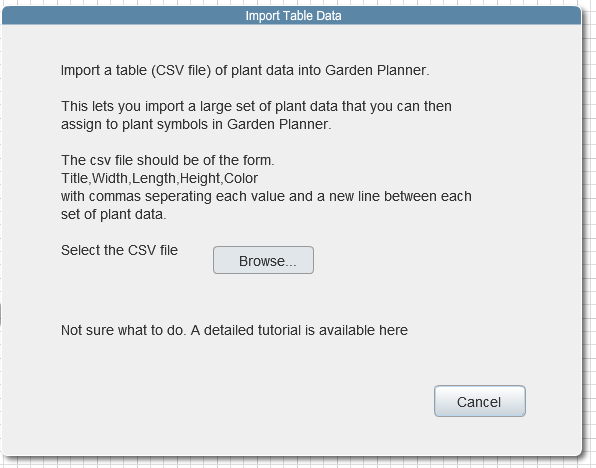
Click on the Browse button and after a moment you will be able to browse to and select your csv file. Once selected it will show a preview of the imported data as shown below.
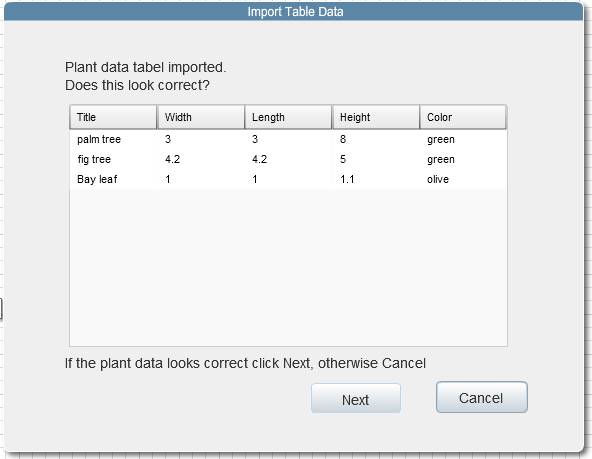
Check that the data looks correct. If anything looks wrong then click cancel and check the tips below. If it looks fine then click Next.
Tip: for US measurements some spreadsheets will wrap quotes around the values if you use " to represent inches it will add extra quotes around everything. so 3'4" may look like "3'4"""
Don't panic this will still work fine and can be ignored.
Tip: if the first line of your data is missing then it is because you don't have the column names as the first line in the table.
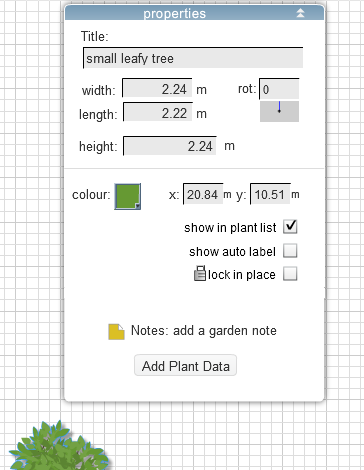 Once you are happy with the data Garden Planner will display a message saying that the data has been added and that you can now select a plant and there will be an add data button in the properties window.
You can click on the Add Plant Data button and it will show a list of your imported data as shown below.
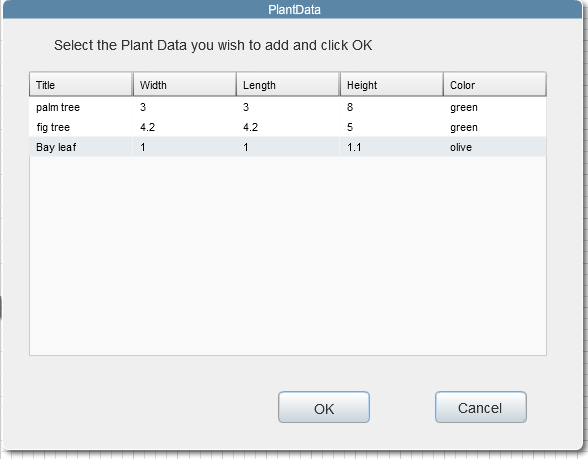
Select the plant data you want to use and click OK. This data will now be copied back to the selected plant.
You can use the plant data over and over again as much as you require.
If you wish to use a new data set simply import the new data and it will replace the old data. However plants that have data added previously will remain unchained. There isn't a link between the data and the plants you add it to. Think of it more as really clever copy and paste tool.
Finally, look for an update soon that lets you add a lot more data, like botanical names, light requirements, planting time etc.